So, What’s Included in Roof Replacement?
A full roof replacement involves more than just swapping old tiles for new ones. It’s a structured process that includes removal, inspection, repair, and careful installation. If you’re wondering what’s included in roof replacement, this guide breaks down every essential stage, helping you understand the work, plan your budget, and ensure your project stays compliant with UK regulations.
Start with a Roof Inspection
The first step is always an inspection. A roofing expert will visit your home, climb into the loft, and examine the external covering. They look for common issues such as cracked tiles, water stains, or rotting timbers. In many cases, drone surveys are used to inspect areas that are difficult to access.
With a proper assessment, the contractor can give you a clear scope of work and an accurate quote.
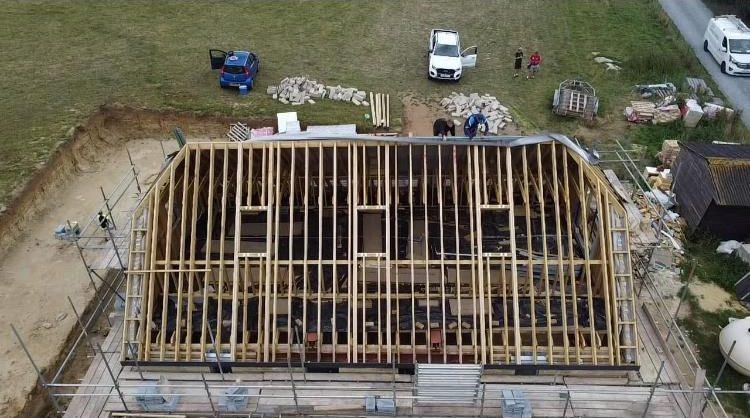
Remove Old Roofing Materials
After the inspection, your roofing team begins by removing the old tiles, underlay, and battens. This stage also involves lifting up the flashing and exposing the structural timbers underneath.
By clearing away the old materials, the team creates a safe and visible surface for new work. It also allows them to spot hidden damage before proceeding.
Repair or Replace Damaged Timbers
Once the roof is exposed, your contractor will check the condition of the rafters and joists. If they spot rot or weakness, they will reinforce or replace those sections.
Making these repairs now is vital. It protects the longevity of your new roof and prevents structural problems in the future.
Fit Breathable Underlay and Battens
With the structure secure, the team installs a breathable membrane. This underlay helps block water while still allowing airflow, reducing the risk of condensation. Next, treated battens are fixed across the rafters. These battens hold the new roof covering in place.
Both steps are essential for maintaining ventilation and ensuring the tiles stay secure.
Install New Tiles or Roofing Material
At this point, the roof covering goes on. You’ll have chosen your preferred material—whether that’s slate, concrete, clay, or a flat roof system such as GRP or EPDM.
The roofing team installs each tile in rows, overlapping them correctly and securing them to the battens. Every detail matters, especially when it comes to alignment and drainage.
Roof installations that follow manufacturer and industry guidelines will last for decades with minimal maintenance.
Secure the Ridges, Verges, and Hips
After laying the main roof covering, your contractor turns to the finishing areas. Ridge tiles are fitted along the roof’s peak, and dry ridge systems or mortar secure them. Verge units finish off the edges, and hip tiles are added where roof slopes meet.
These details protect your roof from wind and water while giving it a neat, finished look.
Inspect and Upgrade Chimney Flashing
Chimney areas often need attention. Roofers check the flashing and replace it if it’s cracked, loose, or corroded. They may also carry out chimney repointing if necessary.
Since flashing is one of the most common leak points, getting this part right is crucial for weatherproofing your home.
Replace Gutters, Fascias, and Soffits (If Needed)
Some homeowners decide to upgrade the roofline during replacement. Fascias support the bottom row of tiles, soffits ventilate the roof space, and gutters remove rainwater from the roof.
If your current system is worn or ineffective, it makes sense to replace it now. Doing so can improve both appearance and performance.
Add Ventilation and Improve Insulation
New roofs must allow airflow to prevent condensation. Your roofing team installs ventilation through ridge tiles, soffits, or special vents.
At the same time, they may recommend improving your insulation. Upgrading insulation not only lowers your energy bills but also helps you comply with UK building regulations.
Final Quality Check and Sign-Off
Once all work is complete, your contractor performs a final inspection. They check the alignment of tiles, security of fixings, and condition of all finishing elements. They also confirm that ventilation and drainage systems function correctly.
At this stage, the contractor will issue your warranty and completion documents.
What’s Usually Included in the Service?
Most professional roof replacement packages include the following:
- Full removal of old materials
- Timber inspection and repairs
- Underlay and battens
- New tile or membrane installation
- Flashing replacement
- Finishing of ridges, hips, and verges
- Ventilation and clean-up
- Waste disposal and scaffolding
Some companies include optional extras such as roofline upgrades and drone surveys, so it’s worth confirming what’s covered in your quote.
Roof Replacement Costs Explained
Prices vary depending on roof size, materials, and property type. Here are average ranges:
| Property Type | Cost Estimate |
|---|---|
| Terraced home | £4,000 – £6,000 |
| Semi-detached | £5,500 – £9,000 |
| Detached home | £7,000 – £15,000 |
| Flat roof | £1,500 – £4,000 |
For an accurate quote, ask Trust A Trade Roofing to carry out a full site inspection. We also work closely with another roofing company for customers closer to Hythe & Folkestone here.
Contact Trust A Trade Roofing for a Full Roof Replacement
At Trust A Trade Roofing, we manage the entire roof replacement process—from the first inspection to the final tile. We ensure every step meets modern standards and long-term expectations.
Contact us here to schedule your roof survey or ask for a detailed quote.
Conclusion
To summarise, what’s included in roof replacement goes well beyond replacing tiles. You’ll receive structural repairs, waterproofing, new roof coverings, ventilation, and finishing touches that meet all current building regulations.
For expert roofing solutions and a stress-free process, speak to Trust A Trade Roofing today.